Categories
Important Links

HDD PCB Test and Repair Skills
Step 1: Check whether the COMS SETUP lost the hard disk configuration information or not: Test the COMS RAM on the motherboard to see the battery is fault or not. The electronic componensts' (such as diodes, transistors, resistors, capacitors, etc.) damage also can caused the parameters error of the hard disk configuration.
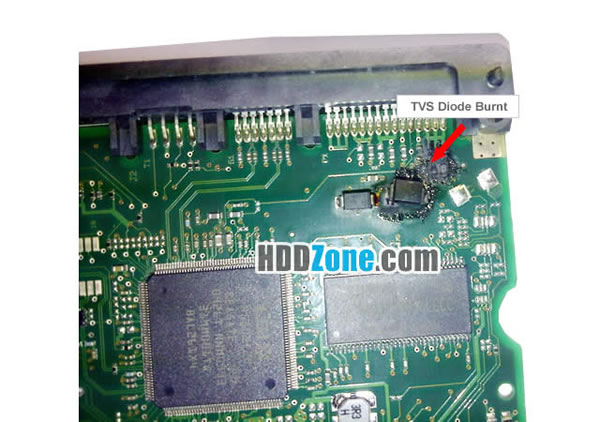
PCB TVS Diode Burnt
Step 2: Power on self-test. If the screen displays the error message as "1701" or "Hard Disk Error", it means the hard disk has problem. The problem may caused the adapter was not plugged in, or the connection of the hard disk and the hard disk's adapter was not plugged in, or the hard disk adapter fault, etc.
Step 3: Shut down the computer. Open the Mainframe Case. Test the +5V、+12V power supply is normal and the computer fan, we can judge the power supply is shortage or not.
Step 4: Check the signal wire, the plug and the hard disk adapter. Are they were anti-inserted or poor contact. You can change the single plug to test.
Step 5: Using the "substitution method" to determine the faulty parts. Find a good hard disk adapter(or a multi-function adapter) connect with the hard disk, then we can judge the problem was caused by the adapter or the hard disk driver.
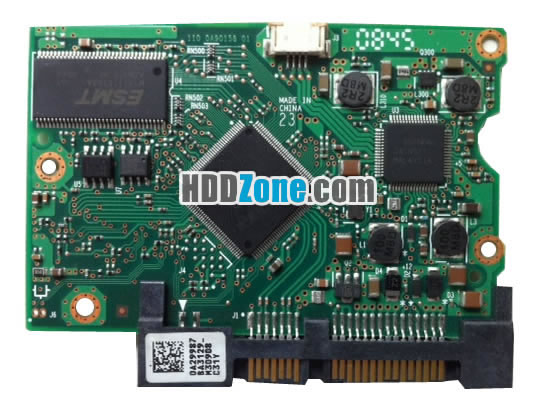
HDD PCB Repair
Note: Above steps need user carefully check, test, analyze, and then find the fault electronic componensts to repair or change the hard disk adapter.
Though the above progressing, as long as the problems were not caused by HDD's hardware corruption, only the problems were caused by poor connection or power supply fault can resolved easily.
Back to Home: HDD PCB Rescources
Why Choose US?
✓ Over 1000+ PCB Types;
✓ 100% Tested Working;
✓ Free Shipping Worldwide;
✓ Secure Shopping by Paypal;
✓ Professional Technical Support;
✓ Customer Loyalty Discount;